
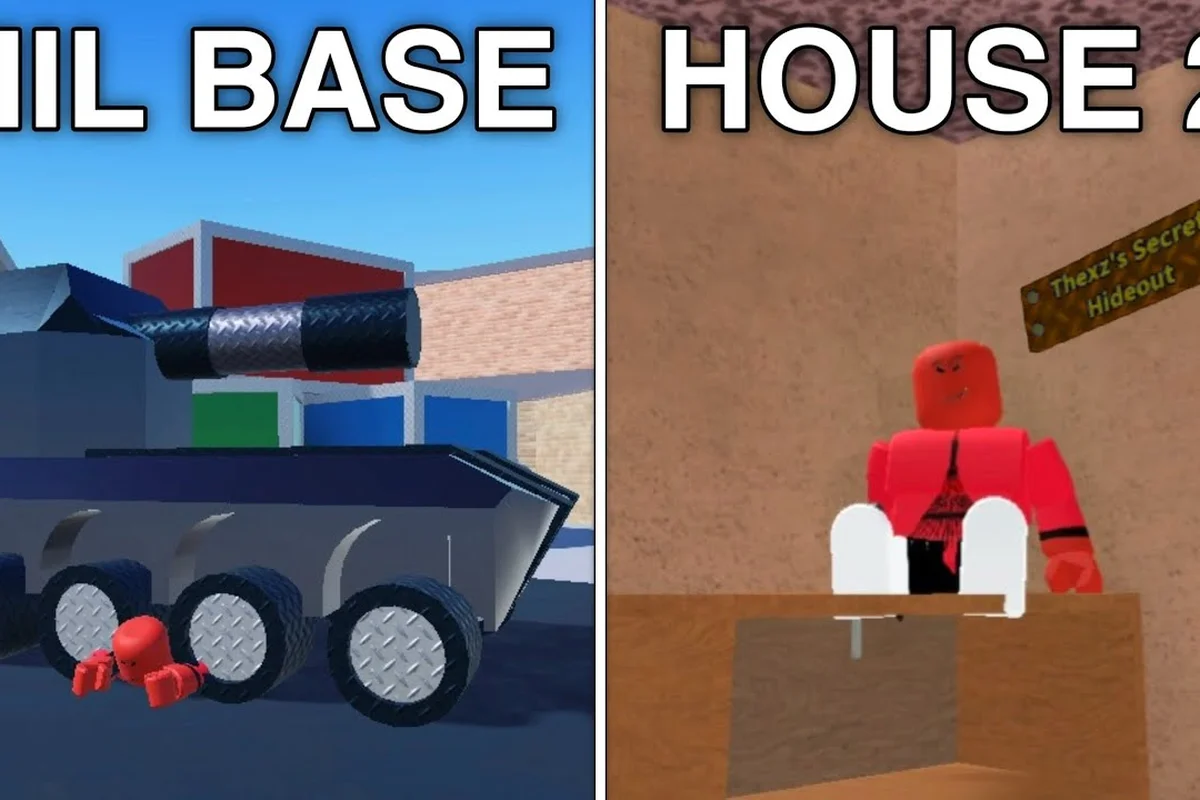
Surviving an innocent round in Murder Mystery 2 often comes down to where you choose to stand, crouch, or wedge yourself during the first 30 seconds after the role reveals. The right corner, the overlooked shelf, or a barely-reachable ledge is often the difference between making it to the sheriff's reveal and being knife-checked in the lobby spawn. This guide breaks down the MM2 best hiding spot conversation by map, by role, and by the kind of trick — whether it's a legit map secret, a lobby callout, or a known glitch corner — that actually gives you a fighting chance.
Whether you are a new innocent who freezes the moment the knife swings or a returning player looking for fresh mm2 map secrets to add to your rotation, the breakdown below is built around real player reporting, consistent sightline logic, and a few well-known mm2 glitches that experienced survivors use to extend their life. By the end, you will have a map-by-map callout sheet and a clear sense of which corner in the Murder Mystery 2 lobby to commit to when the round starts.
Understanding the Hiding Meta in Murder Mystery 2
In Murder Mystery 2, the social deduction loop is short and unforgiving: one murderer, one sheriff, and a swarm of innocents who either survive long enough to be saved or die confirming the kill. The map is small, the role reveals are public, and the murderer's knife travels farther than most new players expect. That combination makes map knowledge the single biggest lever an innocent can pull, because the knife is a constant and the map is the only thing you can actually control.
The hiding meta is built on three overlapping ideas that experienced players lean on. First, sightline denial — a hiding spot that the murderer has to physically turn a corner to check is worth three open-floor positions, because every turn costs the knife a fraction of a second and every fraction of a second is time the sheriff has to read the round. Second, role-specific behavior — an innocent plays to delay, a sheriff plays to find, and a murderer plays to herd, which means the right spot for a sheriff is rarely the right spot for an innocent. Third, lobby timing — the first 5–10 seconds after the role reveal are the most lethal, so any mm2 lobby secret that lets you cross to a defensive position before the first slash is worth more than any single corner.
How the Murder Mystery 2 Lobby Works
The Murder Mystery 2 lobby is the shared space you sit in between rounds, and according to the List of Roblox games entry on Wikipedia, every match begins with players being randomly assigned one of the three roles, then dropped into the map together. The lobby itself is not a gameplay space — it is a queue, a trading floor, and a social hub — but it is also where you pick the loadout you bring into the next round. Knives and guns carry no combat function inside the round for innocents, but the skin animation and the lobby presence do shape who the murderer decides to test first.
The lobby also matters because of callouts: voice chat, quick chat, and the universal "X is sus" emote let a team of strangers coordinate enough to cover the most dangerous choke points within the first 15 seconds. A solid mm2 lobby secret is often less about a single hiding spot and more about a callout pattern — naming the spot, telling teammates where to look, and then rotating so the murderer has to commit to a chase instead of getting a free kill on an unaware innocent.
Why Sightlines Beat Speed
Speedrunning the map and reaching the "safest" corner first works against new players because the murderer is also moving fast. Community testing consistently shows that the slower, smarter rotators who pick a corner with two exit lines outperform the sprinters who run for the obvious far corner, because the obvious far corner is where the murderer goes first. This is the underlying logic behind most of the mm2 map secrets discussed in the rest of this guide: every recommendation is a trade between distance from spawn, exposure to sightlines, and the number of exits the corner has when things go wrong.
Map-by-Map Breakdown of the Best Hiding Spots
Each Murder Mystery 2 map rewards a slightly different style of hiding, and the callouts below come from community-shared mm2 map callouts that have stayed consistent across several major updates. The table below gives a quick reference, and the subsections that follow go deeper on each map's secret corners.
| Map | Best Innocent Spot | Best Sheriff Spot | Risk Level | Notes |
|---|---|---|---|---|
| House 2 | Upstairs bathroom closet | Top of central staircase | Low | Closet has one entry, no second exit |
| Office 3 | Server rack corridor | Reception desk | Medium | Server corridor has a known mm2 glitch corner |
| Bank 2 | Vault side room | Behind teller counter | Medium | Vault room locks once inside |
| Bio Lab | Cold storage hallway | Lab entrance catwalk | High | Cold storage has the longest sightline denial |
| Factory | Mezzanine catwalk | Crate stack near spawn | High | Catwalk is a known mm2 glitches hotspot |
| Lobby | Corner bar booth | Center table | Low | Easiest map, shortest sightlines |
| Mansion | Wine cellar racks | Library upstairs | Medium | Cellar is dark, hard to check quickly |
House 2: The Bathroom Closet Pattern
House 2 is the training map most players learn first, and the upstairs bathroom closet is the cleanest example of mm2 map secrets done right. The closet has one entry, no windows, and the door swings inward — meaning a murderer who rushes in has to either knife through the door or back up and turn. That micro-delay is enough for a sheriff who is rotating through the upstairs hallway to read the chase and get a shot.
The counter-pattern, which experienced players report consistently, is that the murderer will check the closet second, not first, because the obvious first check is the upstairs bedroom across the hall. This gives an innocent who commits to the closet a real 8–12 second window during which they are functionally invisible if they do not move. The same logic applies in reverse to the sheriff, who is better off at the top of the central staircase — a position that gives them eyes on both the bedroom and the closet at the same time.
Office 3: The Server Rack Corridor
Office 3 is where most mm2 glitches conversations start, because the server rack corridor along the back wall has a small lip that lets an innocent clip slightly into the wall geometry. It is not a full out-of-bounds trick; it is a positioning glitch that makes the innocent partially invisible when the murderer checks from the standard angle. Community reports describe the trick as finicky — it requires crouching at exactly the right pixel — but reliable enough to be a known callout in competitive rounds.
The sheriff's position for Office 3 is the reception desk, which gives a clean line on the main hallway and the side office doors. The combination of an innocent in the server corridor and a sheriff at reception is a strong lobby callout, because it splits the murderer's attention and forces them to commit to one of the two threats.
Bank 2: The Vault Side Room
Bank 2's vault side room is unique because the door closes behind you once you walk in, which means an innocent who times the entry correctly becomes effectively unreachable for the rest of the round. The downside is the same as the upside: you cannot leave, and if the murderer checks the vault side room first, you are trapped. The reliable callout, which comes up in most mm2 lobby secrets threads, is to enter the vault room only after you have heard at least one other chase happening elsewhere on the map, which confirms the murderer's attention is divided.
The sheriff's play for Bank 2 is the area behind the teller counter, which has good cover and a long sightline down the main hall — letting a sheriff with a gunner or revolver pick off a murderer chasing someone down the central hallway from roughly 20 studs away. The counter is also the natural fallback if the vault side room trap fails, since a sheriff who falls back here can reset the engagement rather than feeding a free knife kill.
Bio Lab: The Cold Storage Hallway
Bio Lab is one of the harder maps to survive on, because the corridors are long, the lighting is dim, and the murderer's knife can cover a long sightline in a single slash. The cold storage hallway at the back of the map is the most reliable innocent spot because the corner it sits behind blocks the longest visible stretch of the map. An innocent in cold storage is invisible from spawn and from the main lab, which means the murderer has to commit to a long walk just to check.
The sheriff's position is the lab entrance catwalk, which gives a clear view of the main lab floor and a clean shot on anyone who tries to enter through the front door. According to Wikipedia's entry on level design, the deliberate arrangement of rooms, sightlines, and choke points is what shapes how players move through a space — and Bio Lab is a textbook example of a map whose sightline design punishes players who do not learn the corners.
Factory: The Mezzanine Catwalk
Factory is the most aggressive map in the rotation, and the mezzanine catwalk is the most talked-about mm2 glitches corner in the entire game. The catwalk has a rail geometry that, when the innocent crouches at a specific spot, lets them blend into the rail and become nearly impossible to spot from below. It is not a true out-of-bounds trick; it is a sightline trick that requires the murderer to be looking from the wrong angle.
The risk is the same as every other catwalk spot: there is only one way down, and if the murderer knows the trick, they know exactly where to look. The counter-callout that experienced lobbies use is to have one innocent on the catwalk and one innocent at the crate stack near spawn, so the murderer cannot commit to either without exposing themselves to the other.
Lobby: The Corner Bar Booth
Lobby is the easiest map in the rotation, and the corner bar booth is the safest innocent spot because the booth walls are tall enough to block line of sight from the bar entrance. The sheriff's position is the center table, which gives a 360-degree view of the entire map. Because the map is so small, the murderer's chase distance is short, which means sightline denial matters less and movement speed matters more. A new player who simply stays near the bar booth for the first 10 seconds will outlive most of the lobby.
Mansion: The Wine Cellar Racks
Mansion is a medium-difficulty map with two floors and a basement, and the wine cellar racks at the bottom of the basement stairs are the most reliable innocent spot. The racks are tall enough to hide a crouching player, and the basement is dark enough that the murderer has to commit a flashlight-equivalent amount of attention to check. The counter-callout is that the cellar has only one staircase, so a smart murderer will camp the stairs once they hear footsteps.
The sheriff's library perch on the second floor controls roughly 70% of the mansion's vertical sightlines, giving line-of-sight down the second-floor hallway, across the upper landing, and directly onto the basement staircase — making it the strongest fallback if the cellar is compromised, since the sheriff can pivot from wine rack surveillance to lobby callouts without losing map presence. This lofted angle also lets the sheriff catch murderer flanks that the cellar's single-staircase choke point would otherwise hide.
How MM2 Glitches and Map Secrets Actually Work
A lot of players conflate mm2 map secrets (legit positioning tricks the developers left in the geometry) with mm2 glitches (out-of-bounds or clipping tricks that rely on a specific exploit), but the two are mechanically different and the round-by-round value is different. Map secrets are stable across updates and platforms; glitches are version-sensitive and can be patched at any time. Community testing on the speedrun background page on Wikipedia shows the same logic — a route that works once is not a route until it works every time — and the same applies to mm2 glitches.
The table below breaks down the most common mm2 hiding strategies — map secret corners, sightline denial spots, clipping glitches, out-of-bounds routes, and lobby timing tricks — scoring each one on reliability, patch risk, and skill required so you can pick the safest option for your current mm2 lobby rather than guessing which trick will still work after the next update.
| Trick Type | Reliability | Patch Risk | Skill Required | Best Use |
|---|---|---|---|---|
| Map secret corner | High | Low | Low | Default innocent strategy |
| Sightline denial spot | High | Low | Low | Sheriff rotations |
| Clipping glitch | Medium | High | Medium | Surprise plays in casual lobbies |
| Out-of-bounds | Low | Very High | High | Mostly patched in current version |
| Lobby timing trick | High | Low | Low | Pre-round positioning |
The reliable takeaway is that map secret corners and sightline denial spots are the workhorses — they are consistent, low-skill, and survive every patch. Clipping glitches are a fun surprise but should not be the foundation of a hiding strategy, because the moment the patch lands, the corner is gone.
When Glitches Get Patched
The pattern across Murder Mystery 2's update history is that geometry-based glitches (clipping into walls, riding invisible collision) get patched faster than behavior-based mm2 map secrets (corner timing, lobby callouts, role-specific rotation patterns). The reason is that geometry fixes are a one-line change in the developer console, while behavior fixes require reworking the entire map layout. Experienced players therefore commit their long-term strategy to behavior-based secrets and treat glitches as a short-term edge.
The same logic explains why a strong mm2 lobby secrets callout pattern stays useful across updates: the callout is a social coordination trick, not a geometry trick, and social coordination is not something the developer can patch with a single line of code. That same logic is why a piece like our Murder Mystery 2 map voting explainer keeps its bite through every balance patch, since vote-driven lobbies are ultimately a social contract among the players in the room rather than a hard-coded mechanic a single update line can defuse.
Building Your Own MM2 Map Callouts System
The fastest way to level up your innocent survival rate is to build a personal mm2 map callouts sheet — a short, written list of three to five named spots per map that you rotate through based on the round's role reveal. The system below is a simple three-step process that experienced players report using in competitive lobbies.
| Step | Action | Time Cost | Result |
|---|---|---|---|
| 1. Name the spots | Pick 3 corners per map and give each a one-word callout | 5 min per map | Reusable vocabulary |
| 2. Assign by role | Decide which spot is for innocent, sheriff, and murderer-read | 3 min per map | Role-specific play |
| 3. Test in casual | Run the callouts in 5–10 casual rounds and adjust | 30 min per map | Verified corner set |
The naming step is more important than it looks, because callouts only work if your team can say them in under a second. A spot called "the second-floor bathroom closet at the back of the house" is useless in a chase; a spot called "the bathroom" is usable. The shorthand is what makes mm2 map callouts function as a real-time language, and the shorthand is what makes the difference between a coordinated innocent team and a lobby of strangers running in circles.
The Three-Spot Rotation
For every map, you want exactly three spots in your rotation: one primary (the corner you commit to first), one secondary (the corner you rotate to if the primary is compromised), and one emergency (the corner you sprint to when the murderer is directly behind you). Most experienced players pick the secondary as the spot diagonally opposite the primary on the map, because the murderer is least likely to rotate to the opposite corner after checking the primary. The emergency spot is usually the closest defensible corner to wherever you happen to be when the chase starts, which is why the emergency spot is map-specific and requires practice.
The three-spot rotation is the core of the mm2 map callouts system because it gives you a decision tree under pressure — instead of freezing when the murderer shows up, you have a pre-committed answer to "where do I go next?"
Frequently Asked Questions
What is the single best hiding spot in Murder Mystery 2?
There is no single universal best corner, but the upstairs bathroom closet in House 2 and the cold storage hallway in Bio Lab are the two most consistently reported mm2 map secrets across community testing. The actual best spot depends on the map, your role, and the murderer's rotation pattern, which is why a three-spot rotation beats a single favorite corner.
Do MM2 glitches still work in the current patch?
Most geometry-based mm2 glitches get patched within one or two updates, so any clipping or out-of-bounds trick you see in older YouTube videos is likely fixed. Behavior-based mm2 lobby secrets (timing, callouts, corner rotation) are far more reliable because they rely on map layout, not exploit geometry.
How do I use map callouts in a public lobby?
Keep the callouts short — one word per spot — and announce your role and corner in the first 5 seconds after the reveal. "Innocent, bathroom" is enough; the team will rotate to cover the other named spots automatically. According to the hide and seek background on Wikipedia, sightlines and room layout decide most chases, so a coordinated team that controls the named corners wins most rounds.
Is the Murder Mystery 2 lobby itself a hiding spot?
No — the lobby is the between-rounds hub, not a gameplay space, so you cannot hide there during a round. The "Murder Mystery 2 lobby" callout phrase that experienced players use refers to lobby callouts, meaning the voice and chat coordination you set up in the pre-round window, which then carries into the actual map.
What is the difference between an innocent hiding spot and a sheriff hiding spot?
An innocent's spot is built for delay and denial — one entry, no sightline, low mobility. A sheriff's spot is built for sightlines and shots — a clear view of as much of the map as possible and at least one escape route. Picking the wrong type of spot for your role is the most common mistake new players make, and it is the single biggest reason the sheriff dies first in uncoordinated lobbies.